Still using that pencil you found in the couch and an old dictionary as a drawing board? Don’t feel like the biggest computer wiz when it comes to graphics software? There are plenty of inexpensive tools out there that will boost your productivity and enjoyment level when drawing, sketching or just doodling. And you don’t have to spend a ton of money to expand your tool kit in ways that are sure to make your life much easier, giving you more time to draw.
1. Eyes
This can’t be emphasized enough, but the real key to all drawing – cartooning, illustration, sketching, doodling or otherwise – is seeing. Really looking at something, analyzing it, noticing proportions and relationships between parts. For the cartoonist, this is key to exaggeration, knowing which parts to play up and which to play down for the intended effect. I once had a wise drawing instructor who told us that if you spend more time looking at the paper than what you are looking at to draw, you doing it wrong. I suppose for a cartoonist, you aren’t really using an actual model, but I am always referencing my own hands, face, expressions, body poses etc. when working on a new character.
Your eyes are definitely not low-tech – they are one of the coolest parts of the human body (did you know that the optical nerve connecting your eyes to your brain actually meets in the middle when you are an infant? Half of the nerve starts from the brain, half from the eyeball, and they grow and meet, connecting gazillions of nerves together. Insane!). But as far as cost, there are free!
2. Mirror
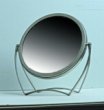 A few mirrors are a must. I have a full body mirror and a handheld shaving mirror – nothing fancy. The full-length mirror is great for getting poses down, seeing where all the limbs go and how they are proportioned to each other. Many times I will do a quick “realistic” sketch, just to get all the parts in the right place, and then toon it up from there.
A handheld mirror that can be set on a desk and swiveled and angled so you can draw things like facial expressions, hands etc. is a must have. I use mine more for this than for shaving! They usually have a bizarre, fun-house “zoom” side to them as well, so you can really see how unattractive the pores of your skin are at 732 times actual size.
3. Light Box
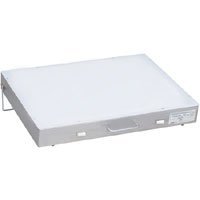 Light boxes are just plain awesome. I held off on getting one of these things for so long because I kept telling myself they were too expensive for a box with some lights inside and plastic on top. This is probably the most expensive of the tools, and I suppose it’s not even cheap. It’s definitely low-tech though. However, the usefelness of a light box far outweighs the cost consideration, so if you average out how much you’ll end up using it compared to the price, it becomes almost free. I was using tracing paper before I got my beloved light box, and after about ten packs you’ve just paid for a light box. As I mentioned in an earlier post, I draw on decent quality inkjet (not copier) paper, because it scans so well into the Mac. I barely use a sketchbook any more – again, a pain to use with the lightbox. Best to have single sheets.
It’s funny, I finally broke down and got one when I had the eureka moment that using the lightbox to draw was like a low-tech version of layers in Photoshop & Illustrator. It’s a perfect way to draw an image in parts, so you can scan in and create in layers in your Adobe software. It just give so much more flexibility to do things this way. Okay, so Photoshop is not a cheap low-tech tool. There are plenty of other uses for the lightbox, the biggest being the ability to collate parts of sketchs into one über-sketch. You know the times when you draw a part of something just right, but the rest of it sucks? And you wish you could get the exact feel but start over with the rest of the art? And redrawing just doesn’t do the trick? I think you get where I am going. Believe me, this little doo-dad is worth every last penny, and the bigger the light box you can afford, the better.
4. Multiple pencil grades
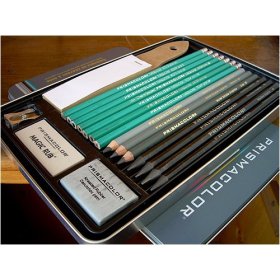 A good set of drawing pencils in multiple hardnesses. Man do I forget this one all the time. This is a biggie: get to know the different pencil hardnesses (or softnesses?). You already know the old standby, 2B. Just about every common pencil out there is 2B or HB. But go to an art store, and you’ll find all sorts of new number/letter combos, from 9H to 9B (The higher the “H” number the harder the lead (and the lighter the mark it leaves), and vice versa for the “B” numbers (“B” stands for “Blackness”).
We’ve all been there – you need a big dark area for the background, so you painstakingly scribble over and over and over and over on the paper until it begins to curl up and get grooved, and in the end it’s really not as dark as you want it. We all try a few more last ditch rounds of more lead, but to no avail.
Now, if you had a 4B pencil – BAM! You’d be making wide, soft, smooth and easily blended swaths of graphite across the page with almost no effort.
And can’t get that pencil tip to stay sharp enough, long enough to get some details done right? Mr. 6H, well that’s his specialty! And this brings me to an increasingly obscure low-tech cartooning tool…
5. Mechanical Pencils & Lead Holders

 Well, the mechanical pencils aren’t obscure, but lead holders (or clutch pencils as they are sometimes called) are fairly rare. They are usually lumped in with drafting supplies. Lead holders are basically mechanicals pencils without the automatic click-feed for the lead. The lead just kind of falls down when you press the release on the back end. Oh, and the leads are way thicker.
What’s so special about these you ask? I think sometimes there is a bias to drawing tools, that they need to be “Art Supplies”, not drafting pencils or anything with the word “mechanical” in them.
Me, I love never having to sharpen them. I’ll keep a couple of lead holders around with HB & 4B lead in either one, and them a mechanical pencil or two with .7mm & .5mm lead. Most mechanical pencil lead seems to be HB grade.
6. Kneaded Eraser
 What the heck is a kneaded eraser? Well, only just the coolest eraser that has walked the face of the earth. And why is this so-called “kneaded eraser” so cool? Well, to start with they are pliable, a bit of a mix between Silly Putty and Play-Doh. This means you can shape them to the most appropriate shape for what you need to erase. No more of that ham-fisted, one size-fits-all approach with those other erasers. No sir.
Another awesome feature of the kneaded eraser is again in it’s pliability: you can twist it up and clean it up. Great for finding a good clean spot so you aren’t smudging things (if you don;t want to smudge that is). Kneaded erasers also have this quality of breaking apart more easily than gum erasers, so your drawing surface doesn;t get all chewed up, and retains it’s surface, or “tooth“.
And of course the final benefit of the kneaded eraser is that it can be a fun toy/stress reliever on your desk. Pretty much like Silly Putty except it will have the opposite effect on the funny pages.
7. Leaning Bridge
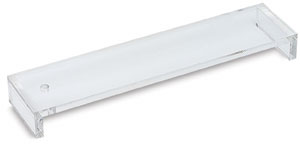 Artist’s leaning bridges are very cool tools. They let you get a firm rest over you drawing without leaning on the actual paper. The stiff plastic of the leaning bridge lays over and around your artwork/drawing surface, allowing you to rest your hands almost as close as if you were resting them right on the drawing surface itself.
Allows one to keep the hand steady for more detailed work, and the clear plastic lets you see what you are doing. Simple, yet ingenious.
I used to tape a couple of rolls of drafting tape to the bottom of my big metal T-Square, but not the ideal solution.
This is probably the distant cousin of the mahlstick, a related tool for you painters out there.
8. Drafting Tape
 Drafting tape is great for when you are using your lightbox to trace. Keeping the layers of paper aligned by hand just isn’t worth the hassle. You want to focus on drawing. Drafting tape looks like masking tape, but it’s a very light adhesive which means you can tape things down, then pull the tape off later and not rip the paper. Of course, you can always do what i used to do and just stick some masking tape to the carpet before you use it, but that’s not really the elegant solution, is it? And what if you have hardwood floors?
9. Pocket Moleskines & Space Pen

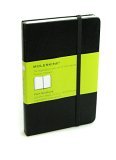
Moleskine journals are stylish and perfectly sized journals that are great to use as sketchbooks. Great writing/drawing surface on the paper, a small pocket on the inside back cover, a built-in cloth book mark and an attached cloth elastic band to keep the covers closed.
These are known as classic artist’s journals, supposedly Van Gogh and other artsy fartsy types from the past were into these journals, and I can see why. They are super durable and will hold up to being used and abused on a regular basis.
I also like the softbound Moleskine Cahier Notebooks but the hardbound are the most popular.
The Fisher Bullet Space Pen does write in space, yes. But the allure here is a properly weighted compact ink pen that goes “full size” when you attach the cap to the back end when using it. They fit right in your pocket and draw like a dream. A very cool little pen.
10. Drawing Board
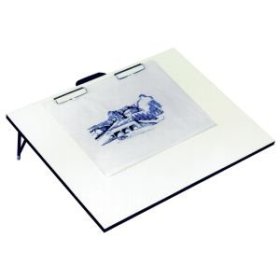 Portable drawing boards are great tools for those of you with limited space, or those like me who have their computer monitors, keyboard and Wacom tablet on their drawing table!
I actually use something far more simpler than the pictured item, but I just couldn’t find any online so I went with the upgraded model. You should be able to find the bare bones version at your local crafts or art supplies store for under ten bucks. They are more designed with portability in mind, but they are also cheap and that’s really the criteria for this post.
And if it’s not clear from the photo, this more fancy model is actually designed to sit on another table – it’s not a drawing table in itself. So you can turn any old table into a drawing table with these. The nicer version usually have a smooth surface that you can count on to be free from potholes and such so your pencil doesn’t zig-zag all over the wood grain or from random blemishes on the drawing surface.
Thanx for the info! I will certainly take this into consideration…I’ve been seeking to have a mini studio at home and I didn’t know where to start….thanx a lot for the tips and links. Is there any thing else you think you forgot or anything you’d like to add?
I tried to stick with the basics here. The big thing is not to get too worked up over tools & gadgets (and I am guilty of that all the time). The tools here are designed to improve the drawing experience by having the right tools, not the coolest.
This post avoided mention of inking and coloring tools because I do all my final work on the computer, so if you are looking to do your final art analog style, you’ll want to look into some resources there as well.
The multiple grades & thicknesses of pencils as well as the light box to me are the two biggies on the list. I think those will enhance your drawing/sketching experience the most. Apart from that, just keep on drawing!
What about scanners? I frequently scan my work into the computer, but fail most of the time to get the whole image scanned. I’m accustom to using fairly large sketchbooks, and our scanner/printer is average-sized. Any suggestions?
Yeah anymore a scanner is getting closer to being a cheap tool, although not really “low-tech” :)
Besides buying a larger area scanner, you’re going to need to scan the art in in sections and reassemble it in Photoshop.
Personally, I started drawing on laser paper instead of a sketchbook as it’s easier to scan in. But I do most of my sketching in Photoshop CS4 nowadays. The Rotate View tool and Spring-Loaded Keys make it much easier.
Hi George, much as I love analogue drawing and painting I feel sure that I could get a lot more out of my drawings if I knew what to do with a graphics package. I don’t even know where to start! Photoshop or Illustrator? I know, “it depends on what you want to do…” Mainly I want to create and fool around with homemade fonts, import mad pictures and photos into my own drawings, collage-style, and generally have lots of fun. Should i just get photoshop and a beginner’s book? Thanks George – Roisin
You might be better off looking at free or low-cost alternatives such as Gimp or Pixelmator (on the Mac). At the very least you can try them and see if digital is your cup of tea.
Also, don’t forget Adobe offers 30-day trials of their software, and also offers Photoshop Express which might have a ll the functionality you need at a lower price than the full version.